Thursday 29 October 2015

Seven faces of Crocheters

 Over my years as a yarn enthusiast, I have found there are seven main types of crocheters, so here they are for your reading pleasure. Which one(s) are you?

Please don't be offended, it's all said in fun ;)

(Personally - I think I am all seven at one point or another!)

1. The Hoarder

The hoarder is a crochet being of immense need, and a great unwillingness to part with, various yarn titbits that have accumulated in their stash. Sometimes hoarders just like to look/smell/feel the yarn in their stash, and dream with anticipation of all the projects they could make, but never will.
Example: my favourite yellow was running out so I refused to use it in any projects. It stayed in my yellow/orange yarn stash, getting considerably tangled and evermore frayed. Until I threw it out.

Note: *shifty eyes* but I didn't. 
Some say it is still in that stash, but I will probably never know as I have stashed more yarn on top of it.

2. The Yarn Snob 


The hand-dyed, grass-fed, free-range, locally shorn, naturally coloured pure-merino-alpaca-blend buyer, who then uses it to crochet on their organic, free-trade Chinese-bamboo crochet hook. These people often start a sentence with,
'Oh, I found this yarn at a local farmers market...' And go on to describe its qualities in detail. Don't tell them you use Kmart acrylic. They pretend not to judge, but they are judgy-judgers.
The Vegans of the Crochet world.
(Note: I am too poor to afford this $25 a skein yarn, hence, I hate them on principle.)

3. The Juggler


The Juggler generally has several half finished projects going on at once. Often two or more are within arms reach of their crocheting corner. Jugglers are akin to butterflies, with a four second memory for what they are currently doing, replaced by a new pattern/yarn/stitch that 'I'll just quickly try...'. Many of these poor projects never find homes, only to be rediscovered months or years later when the Juggler is clearing out the craft cupboard.
*Cough* True Story *Cough*

4 The Perfectionist


Many plans, no crochet.
Perfectionists tend to frog their work when it isn't perfect, and start again.
and again.
and again.
They grow considerably more stressed if their counting is interrupted or, heaven forbid, they added an extra stitch somewhere along the line (Don't fib, we've all done it!). Don't ask a planner when they will be starting their crochet project because the answer will inevitably be a change of subject, a huge rant about the yarn, or a weak excuse like 'when it's ready'.
Truth: it's never ready.

5. The Expert


Often the quiet achiever of the group, the expert can be found you tubing new stitches, yarn reviews, and reading 'Crochet Weekly' on their perfect, doily-covered coffee table. Not to be confused with the 'loud know-it-all' who attempts to teach everyone how to crochet but doesn't know their chain stitch from a crocodile stitch, the expert actually is very good with their hooking, not that they would admit it or give you tips. That's why you probably want to slap their smug little crochet-collared face. (Please teach me!!!)

6 The Newbie

The newbie's favourite phrase involves a few expletives, and you can usually find them crocheting a slightly-longer-on-one-end-oh-God-how-did-this-happen scarf. They can be spotted buying the wrong yarn for their chosen project, and using a hook that is far too big/small. Tension? What's tension?
The newbie has two choices in their crocheting path: fight or flight. They can suffer through newbie-ism and one day become the over-smug expert, or give up on crochet and take up the much less useful craft of scrap booking.
(Keep on truckin', Newbie! We've all been there!)

7 The Over-Achiever. 

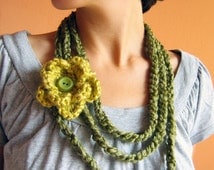
image: http://poppyandbliss.com/
How beautiful!
Too many pattern books, several completed projects beautifully wrapped in hand printed ribbon for your second cousins kids at Christmas, and often a cat. The overachiever enjoys completing projects, even if it means an all nighter. Or an all dayer. One of their most enjoyed moments is presenting their friends with afghans and coaster sets and saying 'oh, it was nothing.'
News flash over-achiever; you're breeding a culture of gift receivers who don't appreciate the 50 hours you put in to that blanket. Stop ruining it for the rest of us! 
On that note, can you make me a...

Hope this made you smile ;)

Rhonie xxx

Sunday 25 October 2015

Princess Alice Dolly Pattern

This cute little lady has already been adopted by my two-year-old, but her pattern is up here for you to give it a go! She will soon have a home; The Princess and the Pea blanket and Cushion Set! This little collection will be available in my shop as of the 1st of January 2016, so pop back and have a look if you're a keen bean!

Here she is!

Super adorable :) And fluffy and soft too!


Here are two little video tutorials for her hair:

How I attach hair strands (yarn!)


And how I fray it so it looks super cute and crimpy! (Really soft too!)


Hope you enjoy! Keep an eye out for the Princess and the Pea blanket pattern & kit: Available January 2016!

Happy Hooking!

Rhonie xx

Wednesday 21 October 2015

Video Tutorial: How to do the Single Crochet Stitch

Hi ladies and gents!

This  video tutorial is how to do a single crochet stitch. A single crochet stitch is the shortest stitch you can make (apart from a slipstitch!) and is great if you want your work to look very tight knit! In a written pattern, it looks like this:

Image courtesy of Hooks & Hanks

1. One loop on hook
2. hook through stitch
3. yarn over hook.
4. pull hook/yarn back through stitch. (2 loops on hook)
5. Yarn over hook
6. Pull both loops over third loop.


Here's how in my video tutorial


Hope you found this easy to follow. I would love to hear your feedback on my videos and instructions - message me on our facebook page in the top right of this blog :)

Thanks - have a beautiful day!

Monday 19 October 2015

Know Your Yarn!!

Hi lovely people,

I receive numerous questions regarding the types of yarn I use, and why I use it! A lot of new comers to crochet aren't quite sure about different types of yarn or its uses so I thought I would describe the the types that I regularly use, how we classify yarn, and what each type is used for!

I will start with how we classify yarn: we go by fibre, weight, and colour/dyelot. I'll start with Fibre!

Fibre: the makeup of the yarn skein.

Most yarns are made from wool (sheep/alpaca usually!), plant fibres (cotton/bamboo), or synthetic (acrylic/polyester). Usually a combo of these! Here are some tips: 
- natural fibres are great for clothing (breathe more!) but are easier to misuse (shrinking, pilling, fluff) and are more expensive. These are the better 'quality' yarns - recommended for use in fancy projects!
- Acrylic is durable, and synthetic blends (any yarn with acrylic/polyester fibres mixed in) are generally the most durable and easy to use. Also cheaper :) 

My favourite versions of these are:
-Stylecraft special DK (100% acrylic)
- Patons Cotton Acrylic blend
- Drops 'Paris' (100% Cotton)

Next the classifications of different yarns by weight.

Weight: the thickness and mass of the yarn thread. 

When we discuss 'weight' - we mean not only the physical 'weight' (in grams/ounces), but also the thickness/fluffiness of the yarn. We also discuss 'ply' which refers to how many strands there are in the yarn. Usually it comes in 4, 5, 8, or 12 ply. Sometimes you can find 10ply or 'super chunky' which has heaps!

Firstly, yarn usually comes in two physical weights - 50g skeins (cotton or small amounts of yarn) and 100g (usually larger skeins of acrylic/ wool blends)

There are several different 'thickness' weights to yarn, and you will generally find the weight on the tag of the skein along with what size of hook to use. I love this sweet list of the different weights from Sheep & Stitch.

but I use #3 & #4 the most, as I make a lot of light blankets, dollies, amigurumi, and some occasional clothes :)
Light Worsted Weight Yarn/ DK Yarn 
(DK stands for for 'double knitting' when you knit two yarn strands together to make your project thicker).

DK yarn is smooth, light, and usually uses a size 4mm - 6mm hook depending on your project. It is great to use in blankets, afghans, and light winter woollies :) I even use it for cute decor like coasters and cushion covers! I feel DK yarn is the most versatile of the weights.

This is Stylecraft Special DK 'Bluebell' - which I love and use constantly :)

Worsted Weight Yarn
I rarely use worsted weight but for an extra thick blanket that isn't too heavy it is great. A similar texture and feel to DK but thicker for winter! Aran type yarn is lovely to use. You can see the difference in the thickness between DK & Aran.

This is Stylecraft Special Aran 'Cloud Blue'

The final aspect you need to account for to create a unified work is colour consistency! 


Colour & Dyelot: The specific dyes and batch used to create the colour of the yarn.

As you can tell by looking at my works, colour is a huge factor. In fact, if a specific brand doesn't have a pretty, bright yellow, or a vibrant orange, I often veto them completely. (orange and yellow are two of the hardest to find!) So yes, I am super picky and a tiny bit OCD. 


Here's where you'll find the colour and dyelot number on your yarn:

This is Stylecraft Special DK
Shade 1241 'Fondant'
Dyelot: 75086
Basically, there is a name/number for the colour/shade, and a number for the dyelot (that means the batch that was dyed together!). dyelots of the same colour can sometimes vary, so if you plan on finishing a project with a lot of one colour, make sure you have enough in the same dyelot or you may have a subtle colour difference through part of your work!

See my previous post on the joy of choosing perfect colours, but once you have found the yarn you like, you CAN mix and match brands. This would involve you finding the colours you like in EXACTLY the same fibres and weights. If you mix & match weights you are likely to end up with a wonky blanket, as I found in my first few years of crocheting! Even if brands say the same weight/fibre on their packaging, sometimes they have subtle discrepancies; it is up to you whether this matters to you or not! I personally don't mind as long as it looks cohesive in the end!

 So don't forget the big three: Fibre, Weight & Colour!


Happy Hooking Sweet Peas!


Rhonie


Friday 16 October 2015

Video Tutorial: How To Do the Half-Treble Stitch! (Half Double in USTerms)


Hi loveys!

Just posting a video of my tutorial on the half-treble crochet (half-double if you're from the U.S). This fabulous stitch is so diverse and easy to do! 

Here's how in my video tutorial:


And here's a write up instructions! 

  • Start with one loop on your hook 
  • Yarn over hook. (two loops on hook)
  • Hook through stitch, yarn over hook, pull yarn back through stitch and keep on hook. (You should have three loops on your hook, hence the name 'treble!') 
  • Hook Through Stitch
    Yarn over hook
    Pull Yarn back through stitch
    Three Loops on hook!
  • Yarn over hook (4 loops)
    and pull all three loops over the 4th loop of yarn.
Ta-da! 

Here's some gorgeous HDC hacks!! 

Half-Double Crochet Hacks!

Thanks guys hope you love it :)

Rhonie

Thursday 1 October 2015

Tutorial & Pattern: Sunny Spring Garden Blanket


This week I have created one of my favourite blankets so far- both in colour and pattern!


I usually go for stripes but decided on a patchwork square blanket with a pretty edging instead.

I chose to adapt some of Attic 24's solid granny squares by continuing the rounds and making them larger.

Here is the original lovely pattern : Attic 24 Solid Granny Square Pattern
You can find my adaptation below :)


I made 20 squares (5x4) in varying colours, all in 8ply acrylic blend yarn :) (top to bottom, left to right)


Top Row (L - R)
1. Lincraft brand 8ply yarn 'Lilac'
2. Stylecraft Special DK 'Lavender'
3. Stylecraft Special DK 'Bluebell'
4. Stylecraft Special DK 'Aster'

Second row (L - R)
5. Stylecraft Special DK 'Aspen'
6. Spotlight brand 'Teal'
7. Stylecraft Special DK 'Turquoise' 
8. Stylecraft Special DK 'Sherbet'

Third Row (L - R)
9. Lincraft brand 8ply yarn 'Mint'
10. Spotlight brand 8ply yarn 'Spring Green'
11. Stylecraft Special DK 'Meadow'
12. Stylecraft Special DK 'Saffron'

Fourth Row (L - R)
13. Stylecraft Special DK 'Matador'
14. Spotlight brand 8ply yarn 'Orange'
15. Stylecraft Special DK 'Spice'
16. Stylecraft Special DK 'Sunshine'

Fifth Row (L - R)
17. Stylecraft Special DK 'Shrimp'
18. Stylecraft Special DK 'Bright Pink'
19. Stylecraft Special DK 'Raspberry'
20. Stylecraft Special DK 'Magenta'

Edging:
Spotlight brand 8ply 'Off White'
Lincraft brand 8ply 'Lilac'

Sunny Spring Garden Blanket


Squares pattern: (Make 20)


Close Up: Rounds 1 & 2
Round 1: Magic Circle. Chain 3. Make 2 Treble Crochets (TC) in the magic circle. Chain 1. Make 3 Treble Crochets. Chain 1. Make 3 Treble Crochets. Chain 1. Make 3 Treble Crochet's. Chain 1 and sl st into first chain 3.


Round 2: Chain 3. TC into same stitch as chain 3. Make 2 TCs in next stitch. Make 1 TC in chain space for 'corner' of square. Chain 2. Make 1 TC in same corner space. Make 2 TCs in each of the next 2 stitches. Make 1 TC in corner space, chain 2, make 1 TC in same corner space. Repeat for next two sides of square. In the last corner space, TC, chain 2, TC, and sl st into the first chain 3.

Close up of Rounds 1 - 4
Round 3. Chain 3. Make a single TC in the next st, and each st on that side. Make 2 TCs in corner space, chain 2, Make 2 more TCs in same corner space. Repeat for other 3 sides of square. For last corner space, Make 2 TCs, chain 2, Make 2 TCs, then sl st into first chain 3.

Round 4 - 7: Repeat Round 3 for each round. You should end up with 21 stitches on each side of your square (And 22 spaces if you count the corners!)


Whole Square
After your last sl st into the first chain 3 of round 7, chain 1, and pull the tail through the chain, to create a secure knot. Try not to pull too tightly or the edge of your square may buckle. Leave a 30 - 50cm tail of yarn to join squares together later.


Joining the Squares


Using the long tail on one of your squares to sew the squares together, place the good sides of the squares together. Here's what the front & back looks like - you will be able to easily tell the difference when you've done a few of them! :)

Front of Square
Back of Square

 Match up the stitches for each side before you start sewing to avoid wonky squares. Starting in a corner space, use your darning needle to stitch together each matching stitch. Join your first four squares together for your first row.

I chose to join each square seperately, using extra long tails of yarn (my reasoning: I didn't want the sewing yarn colours to stand out!), but you may choose to join rows of squares together, and then join the rows. This works really well if you have similar/same colours of squares in your blanket, but not so well if it is rainbow like mine!

To sew the second row like I did, join a single square below the first row, and then add a square to the side. Then use the tail of the next square to join it to the first row, then to the next square to the side. Etcetera etcetera :)

Edging:

Once I weaved in the ends of the yarn and tidied the squares up nicely, I started on the edging.


Round 1. Join your 'Off White' yarn to a corner space, and chain 3. TC in each space around the blanket , which should be 22 stitches for each square edge. When you get to the last square corner, do 2 TCs in the corner, and chain 3, then 2 TCs in the same corner space to make a nice spacey corner that won't pull your edges. Continue the same way around the entire blanket edge.

Round 2 & 3: Repeat Round 1 (CH 3, TC in all spaces, Do corners with 2 TC, Ch 2, 2 TC)

Round 4: Using your Lilac Yarn (or which ever colour you have chosen for the edge!)

Follow my tutorial for Picot Edging here:


Finished Product!
Hope you love this blanket as much as I do!

Happy Hooking!

Rhonie

Monday 24 August 2015

Tutorial: 'Colour Joy' OR 'How to Choose Amazing Colours For Crochet'

While there are many things to consider when organising your yarn for a new project (yarn fibres, weight, and manageability!), choosing colours is one of the most enjoyable parts of commencing a new work. It can also be one of the foundations of the project, and if done right can make your work truly vibrant and joyous! Not done right, it can look like a clown threw up on your grandma's old doilies.


While we all have our own favourite colour pallets, some people find it harder than others to pick a scheme that goes well together. ALL colours can go together, but you need to choose the right TONE of that colour for it to work, or create a blend of tones! For instance, orange and mint green often don't go well together, though they are two of my favourite colours:


But vary the orange tones, and add a teal (opposite to orange) and light green (a different tone of green but in the same colour family to mint green), and you have a vibrant, but more unified combination.


Then there are the colour schemes that remind people of brands or specific objects.... red and gold? McDonalds. Purple and white? Cadbury. Orange and Brown? Jaffas. 

Okay well now I'm just listing things I like to eat.

(side note: this is super cool! A crochet knight's helmet? Who knew this existed!? But it really looks like the knight has come straight from the golden arches...)

But, again, if you vary the tones, your work looks inspired by nature, not a fast-food joint. Add mustard, light/dark yellows, burgundy, and rust.


Then there are the colours that most people loathe, that happen to work particularly well with some pallets! 'Nappy Gold'? You can merge that with some greens and create a beautiful nature-themed pallet. (If you have been around a newborn baby long enough you know what I mean by 'nappy gold')
 

So, choosing colours. What are my tips? 
***

One: consider choosing a stimulus. 

For my crochet stool covers:


I used an artwork from our home as a basis.


But for my Sunburst Blanket


I just chose my favourite colour combinations and went from there! 

Your stimulus could be as simple as 'warm' or 'cool' pallet, like these

Warm:  Cool: 
***

Two: Use the Colour Wheel! 

For those who aren't sure about basic colour schemes, the colour wheel is always fabulously helpful if you know how to use it! You have your primary colours - Red, Yellow, and Blue - and your Secondary Colours - Green, Purple and Orange. Tertiary colours are when you add a primary colour to a secondary colour, resulting in colours like teal (green + blue), shades of brown (varying amounts of each one primary colour & opposite secondary colour - eg: yellow + purple, blue & orange, red & green).

You could use an Analogous colour scheme - which means colours next to each other on the wheel, like this (the next 3 yarn colour wheel images taken from Fresh Stitches - visit them here! They also discuss choosing colours for yarn beautifully :)) 

Example of Analogous Colours: Green, Blue, Purple


Complementary Colour schemes mean colour choices that are opposite each other on the colour wheel, like this!


An example of Complementary colour scheme: Indigo and Gold (colour wheel opposites)


If you want a few different colours, try for Split Complementary, which is a little less 'in your face' than regular complementary colours.


Example of Split Complementary Colours: This gorgeous Etsy find:

***

3. Use samples of your own yarn to work out a colour pallet! 

I love using a sampler (or just laying out all my yarn and switching it around to choose great colour combinations!) As I'm a pretty visual/kinaesthetic person!

I love what Lucy from Attic 24 has done with these pegs! 


***

4. Vary your pallet.

Rather than simply using two colours - Purple and Pink - use several varying shades and tones of those colours from red-pink, to lilac, to violet, to indigo. Include one or two pastel shades, but not too many if you want a really rich, vibrant effect.


Or if you choose several colours, here are some beautiful, bright, colour pallets to choose from! You can find so many inspirational colour pallets on platforms like Pinterest (where I get most of my inspiration!)


***

5. LOVE your colours!

But my main tip is just choose colours you LOVE to look at together! If you love it, you will use it. Or if it's for someone else, they will know how much love (and time!!) you put into it! 

Hope your colour journey goes brightly! 

Love and rainbows, 

Rhonie xx