Monday 24 August 2015

Tutorial: 'Colour Joy' OR 'How to Choose Amazing Colours For Crochet'

While there are many things to consider when organising your yarn for a new project (yarn fibres, weight, and manageability!), choosing colours is one of the most enjoyable parts of commencing a new work. It can also be one of the foundations of the project, and if done right can make your work truly vibrant and joyous! Not done right, it can look like a clown threw up on your grandma's old doilies.


While we all have our own favourite colour pallets, some people find it harder than others to pick a scheme that goes well together. ALL colours can go together, but you need to choose the right TONE of that colour for it to work, or create a blend of tones! For instance, orange and mint green often don't go well together, though they are two of my favourite colours:


But vary the orange tones, and add a teal (opposite to orange) and light green (a different tone of green but in the same colour family to mint green), and you have a vibrant, but more unified combination.


Then there are the colour schemes that remind people of brands or specific objects.... red and gold? McDonalds. Purple and white? Cadbury. Orange and Brown? Jaffas. 

Okay well now I'm just listing things I like to eat.

(side note: this is super cool! A crochet knight's helmet? Who knew this existed!? But it really looks like the knight has come straight from the golden arches...)

But, again, if you vary the tones, your work looks inspired by nature, not a fast-food joint. Add mustard, light/dark yellows, burgundy, and rust.


Then there are the colours that most people loathe, that happen to work particularly well with some pallets! 'Nappy Gold'? You can merge that with some greens and create a beautiful nature-themed pallet. (If you have been around a newborn baby long enough you know what I mean by 'nappy gold')
 

So, choosing colours. What are my tips? 
***

One: consider choosing a stimulus. 

For my crochet stool covers:


I used an artwork from our home as a basis.


But for my Sunburst Blanket


I just chose my favourite colour combinations and went from there! 

Your stimulus could be as simple as 'warm' or 'cool' pallet, like these

Warm:  Cool: 
***

Two: Use the Colour Wheel! 

For those who aren't sure about basic colour schemes, the colour wheel is always fabulously helpful if you know how to use it! You have your primary colours - Red, Yellow, and Blue - and your Secondary Colours - Green, Purple and Orange. Tertiary colours are when you add a primary colour to a secondary colour, resulting in colours like teal (green + blue), shades of brown (varying amounts of each one primary colour & opposite secondary colour - eg: yellow + purple, blue & orange, red & green).

You could use an Analogous colour scheme - which means colours next to each other on the wheel, like this (the next 3 yarn colour wheel images taken from Fresh Stitches - visit them here! They also discuss choosing colours for yarn beautifully :)) 

Example of Analogous Colours: Green, Blue, Purple


Complementary Colour schemes mean colour choices that are opposite each other on the colour wheel, like this!


An example of Complementary colour scheme: Indigo and Gold (colour wheel opposites)


If you want a few different colours, try for Split Complementary, which is a little less 'in your face' than regular complementary colours.


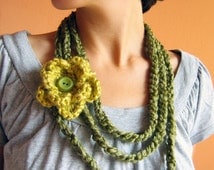
Example of Split Complementary Colours: This gorgeous Etsy find:

***

3. Use samples of your own yarn to work out a colour pallet! 

I love using a sampler (or just laying out all my yarn and switching it around to choose great colour combinations!) As I'm a pretty visual/kinaesthetic person!

I love what Lucy from Attic 24 has done with these pegs! 


***

4. Vary your pallet.

Rather than simply using two colours - Purple and Pink - use several varying shades and tones of those colours from red-pink, to lilac, to violet, to indigo. Include one or two pastel shades, but not too many if you want a really rich, vibrant effect.


Or if you choose several colours, here are some beautiful, bright, colour pallets to choose from! You can find so many inspirational colour pallets on platforms like Pinterest (where I get most of my inspiration!)


***

5. LOVE your colours!

But my main tip is just choose colours you LOVE to look at together! If you love it, you will use it. Or if it's for someone else, they will know how much love (and time!!) you put into it! 

Hope your colour journey goes brightly! 

Love and rainbows, 

Rhonie xx

Tuesday 18 August 2015

Crochet Love: Happy Rainbow Stool Cover (With TASSELS!)


Rainbows and Tassels! Could it get any better?

I love rainbow. I love tassels. So when I find a pattern I can adapt that includes both... YAY!! I came across this pattern the other day and simply had to try! Thank You Atty's for the inspiration!

I have had these two boring timber stools in our kitchen since we moved into the house, and I've tried putting cushions on them, and covering them up, but they just get stuff dumped on them and are generally useless because they're uncomfortable and not super good looking!

I loved the colours of the original by Atty's, but the covers had to match our home, which are much brighter. The colours I used were (in order on the pictures below, Left to Right)


Off-White 
Fuschia
Candy Pink
Salmon
Apricot
Sunset Orange
Gold Yellow
Meadow Green
Mint Green
Turquoise
Lilac
Violet

Cornflower Blue
Teal
Light Green
Yellow
Mustard
Tangerine
Red
Hot Pink
Light Pink
Lavender
Indigo

The Woven Stripes


I started by making one stripe. The measurements were 53 chains (50 + 3 to turn) for my stool. Make sure you check yours before you make more than one stripe

1. Chain 50 (or however many you need for your stool width) Chain 3.
2. Turn your project.
3. Make a treble crochet (AU/UK measurement) into the third chain from your hook. Put a treble crochet in each chain (50 for me) until you reach the end! Chain 3.
4. Turn your work.
5, Make a treble crochet in the first stitch, and then every stitch after, until you reach the end. Slip Stitch into the first ch 3.

:Measure how many you will need for the WIDTH of your stool. Repeat the directions for your Width stripe for however many you need.

Measure the LENGTH of your stool (mine was square so I had the same measurements for both) and chain however many you need. Repeat the directions for your Length stripe for however many you need.

My stool was square, so I ended up with 24 stripes - 12 for the Width of the stool, and 12 for the Length.

When you have arranged your colours the way you want them (I was a little OCD and insisted on splitting mine into two sections etc, but it would look fabulous with any combination!) weave them together as in the pictures to see how they look. Swap over any you think need to be moved (eg: any colours that are too similar could be moved further away)

I then single crocheted along each side. Atty's (the original pattern) suggests to single crochet all the WIDTH stripes together (1 short side only) and the same for the length, then weave them together and do the other two sides. You should do what works for you :) I found my work didn't move a lot once I had woven it together.

The Edging


The edging was extremely simple on mine. I used off-white yarn to make 5 rows of treble crochets, with a single chain at each corner in each row.  For a sixth row, I did the same but in double crochets. I didn't increase or decrease crochets, so my cover fit my stool really snugly :)

The Tassels


I LOVE TASSELS!

Cut 6 pieces of the same colour yarn (or you could mix it up for a bit of fun!) and fold in half. Place your crochet hook through the crochet stitch you want to attach the tassel to, from the back to the front. Grasp the bunch of yarn (at the centre fold when it's folded in half) and pull in through the hole, front to back. Pass the two end sections through the loop you have made, and pull it tight. Trim them all to be the same length (I find it handy to use a comparison measure the length you want them so you don't end up with choppy tassels!)

Ta-da! Tassels! :)

Weave in your ends and trim any fly aways.


And there you have it! Your very own Happy Rainbow Stool Cover (With Tassels!)

And again - here's the original link to Atty's pattern.

Happy Hooking!!

Rhonie xxx


Wednesday 12 August 2015

Crochet: Cosy Blanket

This beautiful and easy blanket is from one of my favourite blogs: Attic 24! I have seen so many versions of this blanket and have done three myself now (all in different colour pallets and styles!) and had to share my latest one, which I made for a friend's baby girl!


Here is the link to the pattern here. 
I love the subtle but dainty detail and the rich colours. I edged it simply in two rows of single crochets- I wanted to accentuate the light turquoise colour. 


This project ended up being approx 1m by 80cm, and I felt was a lovely size for a pram blanket. I used a 4.0mm hook. The colours/ yarn I chose was all 8 ply worsted weight yarn from various sources: 
Light turquoise
Teal
Emerald green
Sea green
Meadow green
Golden yellow
Tangerine orange
Fuchsia 
Hot pink
Candy pink
Deep violet
Lilac 
Mulberry


I suggest everyone tries this gorgeous pattern in your lifetime as it grows quickly and you can enjoy your colour choosing rather than focussing on nitty gritty patterns. Especially if you like to half watch old movies and tv shows from the 90s as you crochet.

I adore striped patterns, as you don't have the fiddley joining! 

Happy hooking, 
Rhonie


Monday 10 August 2015

Tutorial: Slip-Stitch & Foundation Chain

Here's a quick tutorial on how to make a slip stitch (the first circle of yarn you put on your hook to start your project.

Tutorial: How To Make a Slip Stitch

And a second tutorial on how to crochet a foundation chain for your project! When I was learning, there were three things I considered:
1. Take yarn over the back of the hook to the front.
2. Slip the first loop over the hook and the yarn in the hook nook!
3. Keep tension as equal as possible. 

Don't make your loops too loose (gappy!) or too tight (can't work back into them). Practise chaining to get comfortable with the manipulation of the crochet hook and tension. Happy hooking!

Tutorial: How to Foundation Chain

Hope these help you begin your new project! Check back soon to check out a tutorial on single and double crochets!

Happy hooking,

Rhonie xxx

Friday 7 August 2015

Crochet Love: Happy Sunburst Lapghan


Happy Sunburst Lapghan is a project I created for myself as a treat for having my second baby! He was an autumn baby so I knew I'd need something to keep us warm for night feeds : and the Happy Sunburst Lapghan was born! 

I chose my pallet of rich, bright colours (surprise!) and got to work! 

Pattern for Happy Sunburst Lapghan:
I used the basics from Nitty Bits here, which uses chain stitches, half-double crochets, double crochets, puff stitches, and cluster stitches! Once you've got the hang of crocheting, the stitches come easily (not to mention you repeat them a lot so you learn pretty fast!) I will be putting up some video tutorials next week for your viewing pleasure! We are currently away from home visiting the family or I'd do it sooner.

I made 49 squares but added another 7 as it needed a bit more length! Totalled 56 when it was finished. I made each of mine unique but there's no reason why you couldn't choose a simple 3 colour pallet! I would love to see this done in turquoise, teal, and lime green, or pinks and purples! I chose cream to finish it off because it's a little deeper toned to match the rich colours of the Sunbursts.

I joined my squares using the invisible joining technique from Attic 24
http://attic24.typepad.com/weblog/joining-granny-sqaures.html And it worked out beautifully! Would definitely recommend this pattern for anyone who loves an eclectic look with a happy vibe! 


I'd love to see your Sunbursts! Please share if you've created one! 

Peace,
Rhonie xxx

Thursday 6 August 2015

Welcome to my Sunny Little Rainbow!

Sunny Little Rainbow is a blog dedicated to all things beautiful; mostly regarding home-made yarn creations and crochet, and education/home life of my amazing family. I am a stay-at-home mummy of Miss I (2.5 years old) and Master M (3 months old).

I love to crochet; most recently my husband attempted (unsuccessfully) to ban me crocheting any more rainbow blankets and afghans due to the sheer number accumulating in the blanket stack. 

I love rainbows, colour, and am attempting to curb the OCD of colour ordering all my yarn endeavors. I hope to sell some of my patterns and blankets through Sunny Little Rainbow, and possibly my favourite yarns in the future :)

I love to learn, and love to learn about learning (I'm a teacher - both of Senior Drama/Art, and Early Childhood!) and I have a passion for Montessori and Reggio Emilio style learning, which I use at home with my kidlets. Here they are, the cheeky little puddings!


So, all in all, I'm going to post a bit about everything, but mostly crochet, beauty, and learning! Can't wait to begin, and hope you love it as much as I do!

Peace,
Rhonie

xxx